


Best WooCommerce Plugin for Printing Shipping Labels (Step-by-Step Guide)
January 08, 2026
January 08, 2026
Every store owner knows the struggle of turning an order into a parcel. Printing shipping labels one at a time. Copying and pasting addresses. Double-checking AWB numbers. Tracking down courier info. It all adds up and, honestly, it eats through your day fast.
But when your store’s admin comes with built-in shipping label tools, everything changes. You skip the hassle. The GST WebPlanex WooCommerce plugin does just that. If you want a plugin for global Invoices, we’d suggest Webplanex PDF Invoices and Packaging Slips for WooCommerce. It lets you create and print shipping labels straight from your orders list, with no extra steps, just a few clicks, and you’re done.
In this guide, we’ll walk you through:
A shipping label is the document you attach to a package before dispatch. It contains all the essential information couriers need, such as:
Accurate shipping labels help with the prevention of delivery errors, returns, and customer complaints. When it’s printed directly from your WooCommerce dashboard, it saves you time, effort, and manual mistakes.
The GST WebPlanex plugin is designed to help Indian WooCommerce sellers streamline order documentation. Some key advantages include:
This all-in-one approach makes it one of the best plugins for printing shipping labels if you’re already handling GST and billing automation in your store.
Here’s how to generate and print shipping labels using GST WebPlanex:
Before you can create a shipping label, the order must be completed(i.e, the status should not be void, cancelled, refunded, or partially refunded). If an order is still “void”, “cancelled”, “refunded”, or “partially refunded”, the system won’t allow label generation.
In the sidebar, go to WooCommerce, then head towards orders. There, you can see every order from your store in a list.
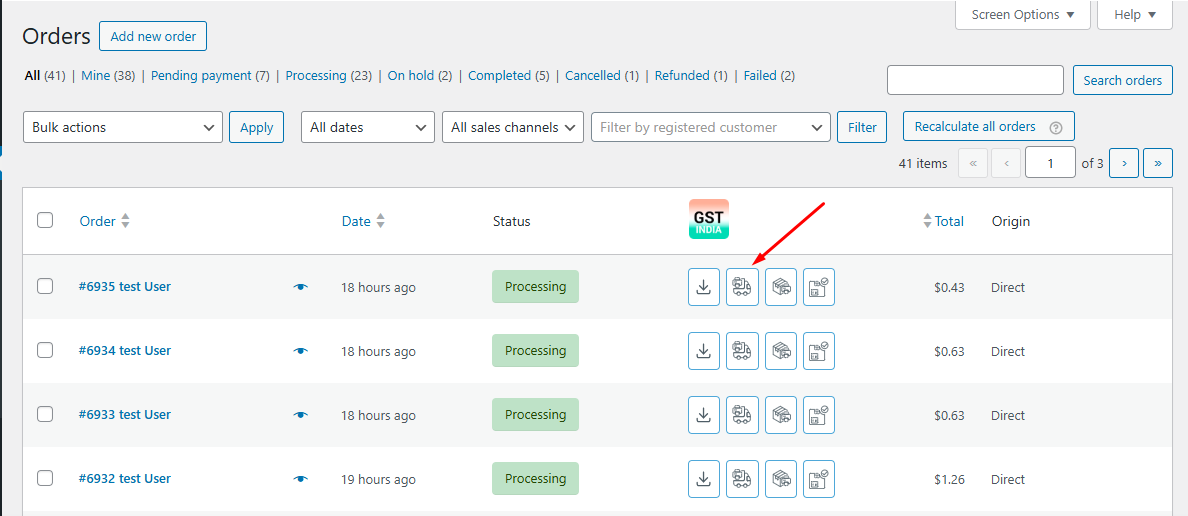
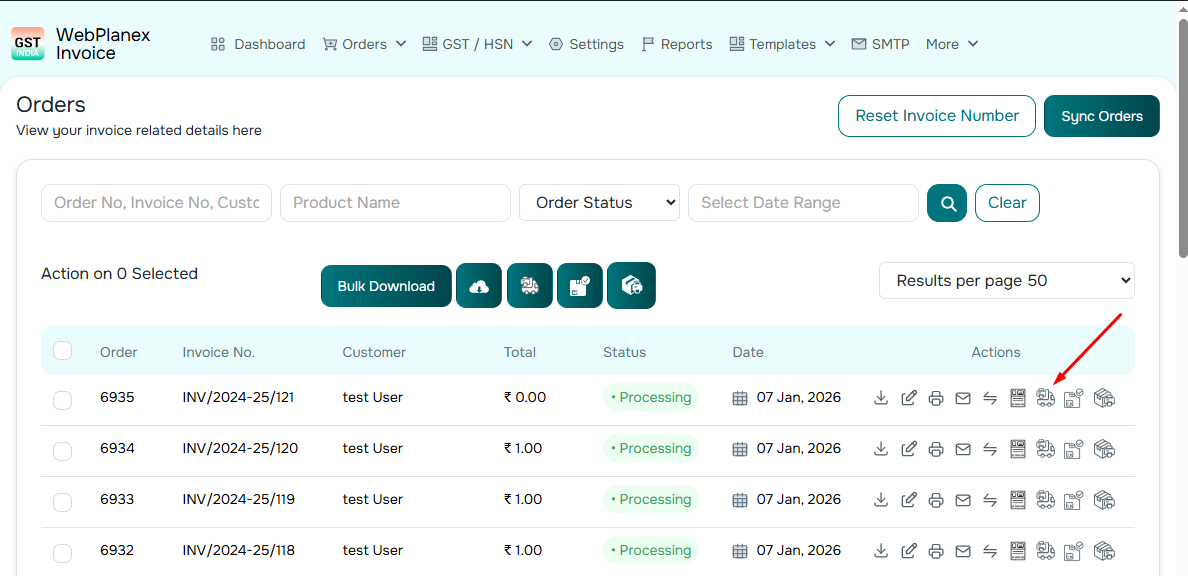
When an order receives its AWB (Air Waybill) number, the 'Print Shipping Label' option becomes available. You’ll spot a row of icons next to each order. Look for the shipping label one, it’s right there with the rest.
Click the “Print Shipping Label” icon. The plugin pulls all relevant details, sender address, customer shipping address, products, and AWB number, and formats them into a clean label.
Once your label is generated, you can:
This helps you stay organized even when you’re handling multiple shipments.
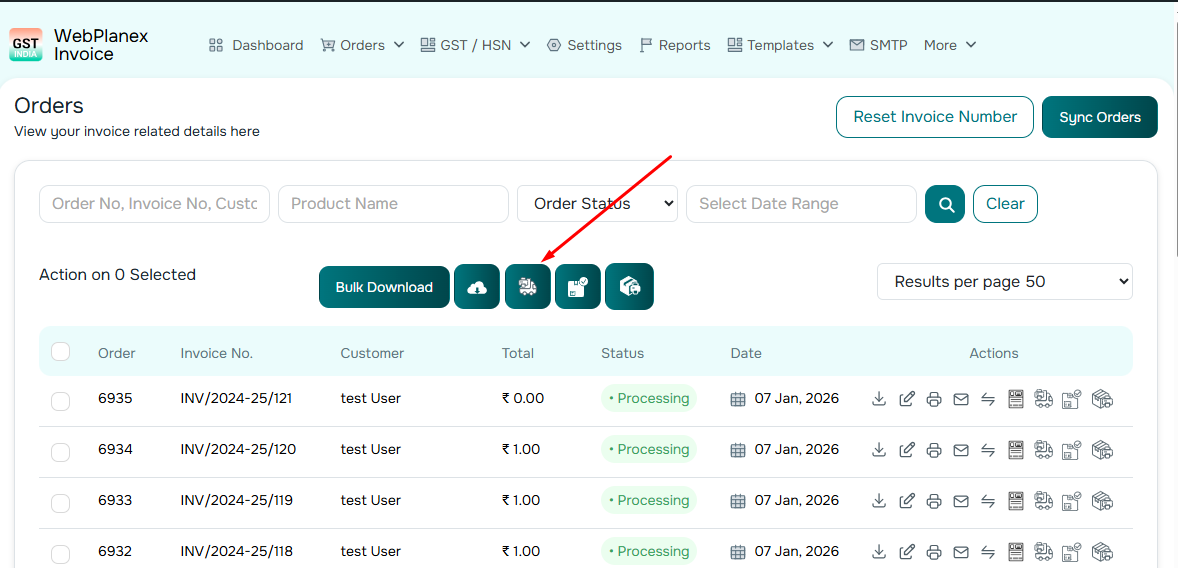
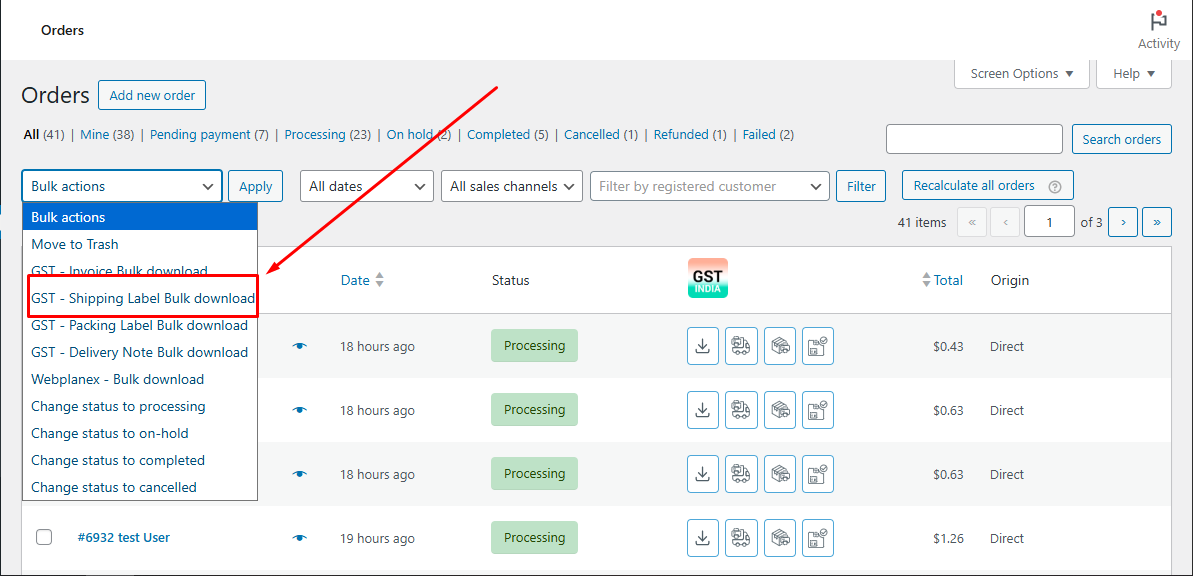
If you ship many orders in one batch, you don’t need to print labels one at a time.
With GST WebPlanex, you can generate a bulk shipping labels ZIP file, a compressed folder containing multiple label PDFs. This helps when you have days with dozens or hundreds of shipments and want to speed up fulfillment.
This feature is especially useful if you print all labels once a day or send bulk shipments to a courier partner.
Shipping labels sound like a tiny piece of the whole order process, but they really make a difference when it comes to getting things right and fast. With GST WebPlanex, you can create and print shipping labels directly from WooCommerce, no fuss, no hiccups. It keeps everything moving and helps you avoid mistakes that slow things down.
Whether you’re shipping a few orders per day or managing a high-volume store, this integrated approach can save hours of work and reduce manual errors, making this plugin one of the best WooCommerce shipping label solutions available.